The Authentik website is an online road trip planner where you can customize your trip to suit your interests.
But before you can customize your trip, you must first choose your road trip and calculate your price using the buttons provided for that purpose.
Once you have calculated the price of your road trip, you will be directed to the “Price” tab. Here you will find all the details concerning the price of your trip.
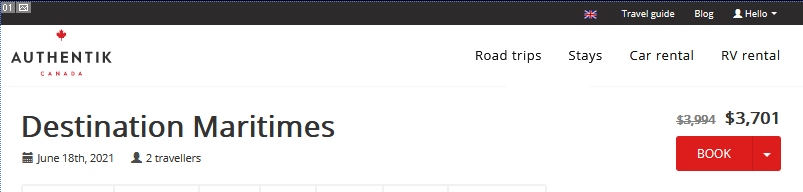
Before we look at how to use each tab to modify your road trip, here is what you will find in the page header:
- Road trip title
- Departure date
- Number of travellers
- Travel reviews
- Price
- “Book” button
1- Road trip title
This is the name of the road trip you have chosen, which will be used as a reference throughout your trip planning.
2- Departure date
Under the title you will find the departure date you selected. You can change this departure date at any time by clicking on it.
3- Number of travellers
Next to the date you will see the number of travellers you indicated when calculating the price. Click on this link to change the traveller details.
4- Travel reviews
Under the road trip you will also find the average traveller rating (out of 5). Click on this rating to see the reviews.
5- Price
The total price is indicated above the red “Book” button. This price will be automatically updated each time you make a change to your road trip.
6- “Book” button
When you click on the red “Book” button on the top right of the page, you will be directed to the secure payment form to proceed with booking your trip. A deposit of 20% is required and the balance is payable 60 days before your arrival.
Underneath the road trip header, you will find a number of tabs to navigate between the different sections that let you customize your trip.
1- “Summary” tab
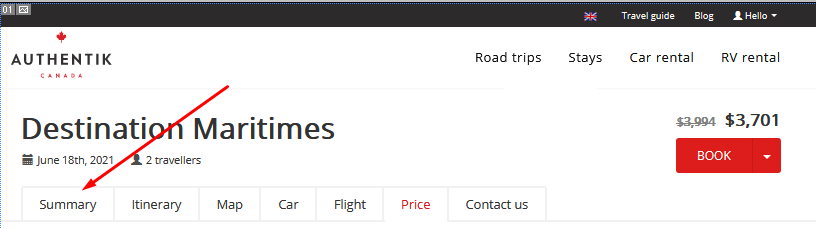
The "Summary" tab provides a day-by-day summary of your itinerary with the name of each day's destination and the driving distance. Note that you can click on each day for more details.
1- “Detailed Version” button
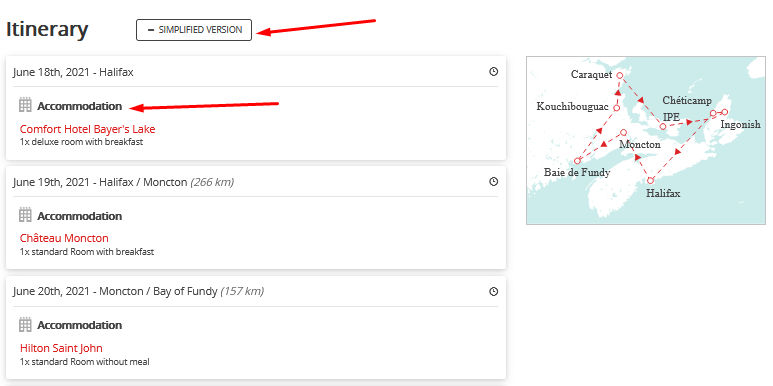
Tip: Click on the “Detailed Version” button to the right of “Itinerary” to see the accommodations and activities that have been selected for each leg of the trip.
2- Map
To the right of the itinerary, you will see a small map showing the route of the selected road trip. You can click on this map to access an interactive map of your route. This map is also found under the “Map” tab, and is updated automatically with every change you make.
Read the “Map tab" section of this tutorial to learn more about your interactive road trip map.
To the right of each day, you will notice 3 icons that let you add a destination or duplicate or delete a day.
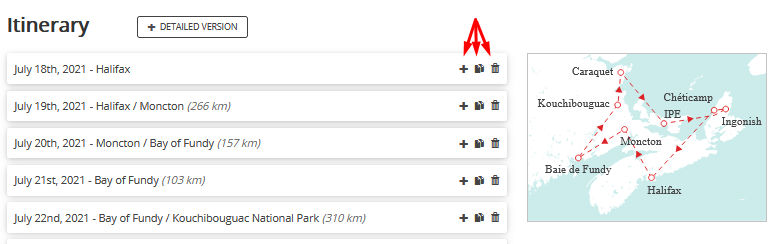
3- Add a destination (+)
By clicking on the “+” icon to the right of a day, you can add a destination of your choice to the program.
You will be given the option to add the new destination before or after the current day. Note that “After this day” is selected by default, meaning that your new destination will be inserted after the current day.
Next you will see that you can add a destination offered by Authentik OR a custom destination.
3.1- Destination offered by Authentik
The destinations offered by Authentik have all been studied by our local experts and are not to be missed. They are also the destinations for which we have developed a verified accommodation offer and which, most of the time, offer a selection of optional activities.
Authentik destinations are sorted by distance, from the closest to the farthest from the current destination.
3.2- Custom destination
Of course, it is also possible to add a destination that is not offered by Authentik. To do so, simply enter the name of the city you wish to visit. It is important to use the name of a city and not a park or an accommodation, as the search only works with city names.
When you choose a custom destination and go to the details of the new day by clicking on it, you will notice that Authentik does not offer any accommodations for that destination. To make the most of all the features of our road trip planner, we strongly recommend providing the address of your accommodation in the space provided for that purpose. Among other things, this address will be used when creating your roadbook.
4- Duplicate this step
By clicking on the “Duplicate this step” icon, you can add an additional night to the selected leg of the trip.
Note that when you duplicate a day, the new day is added AFTER the current day.
5- Delete this step
Clicking on the “Delete this step” icon removes the selected day from your itinerary.
Note that it is also possible to perform these 3 actions in the “Itinerary”, tab, where you will find the same 3 icons.
---
At the bottom of the “Summary” tab content, you will find these 4 buttons:
- Add a destination
- Change days order
- Inverse itinerary
- Reset all

1- Add a destination
This is the same as the “+” icon to the right of each day. It is explained above in the section “Add a destination”.
2- Change days order
When you click on this button, 3 small lines appear at the end of each day in the “Summary” tab. These lines allow you to drag and drop days to the desired position in your itinerary.
Important: When you have finished changing the order of your itinerary, you must click on the grey “Done” button at the bottom of the page to apply your changes.
3- Reverse itinerary
Clicking on this button reverses the order of the itinerary. In other words, the last day becomes the first day, and vice versa.
4- Reset all
Clicking on the “Reset all” button will UNDO ALL THE CHANGES you have made to your itinerary since you started, taking you back to the original road trip.
---
Finally, at the very bottom of the “Summary” tab (and all the other tabs), you will find the following 3 big buttons:
- Quote by email
- Book

1- Print
This button lets you print your detailed quote so you can show it to your family or friends.
Before printing, we recommend you finish making all your changes so that you will be printing the latest version.
2- Quote by email
Instead of printing your detailed quote, you can send it by email to yourself or someone else.
The quote by email has the advantage of containing several links you can click on to obtain more detailed information about the different features of your trip. It is also a more environmentally friendly option.
3- Book
As the name suggests, the red “Book” button is used to book all the services included in your road trip. It is the same button found at the top of the page.
Consult How do I book my road trip? for more information about booking.
2- “Itinerary” tab

This tab is by far the most often used in customizing a road trip, as this is where you can select your accommodations and add activities to your program.
1- Timeline
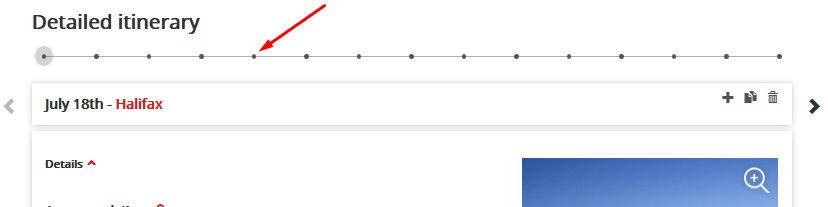
The first thing you will notice under the heading “Detailed Itinerary” is the timeline. The timeline shows all the steps in your itinerary, with each point representing one day.
When you position your mouse over a point on the timeline, you will see the title of the corresponding day.
You can click on each point to go directly to that day.
2- Day title
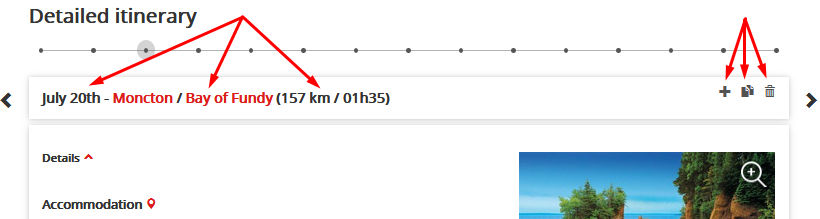
Beneath the timeline, you will see a rectangular area with the title of the selected day.
Example: July 20th - Moncton / Bay of Fundy (157 km / 01h35)
First, you will find the actual date on which that day will take place.
Next, the name of the destination is shown in red. Note that you can click on the destination name to open the travel guide for that destination. The travel guide contains a host of practical information such as sights to see, suggestions for restaurants and activities, a tourist map, travel reviews, and more.
The day title will sometimes contain 2 destination names. This indicates that the day includes driving from one destination to the other.
In such cases, the distance in kilometres and approximate driving time are shown at the end of the title line.
At the end of this line, you will find the same 3 icons we presented above in the “Summary” tab. Please refer to this section to learn how to add a destination, duplicate a day or delete a day.
Finally, there is an arrow at either end of the day title line. Use these arrows to move between days (you can also use the timeline for this, as described above).
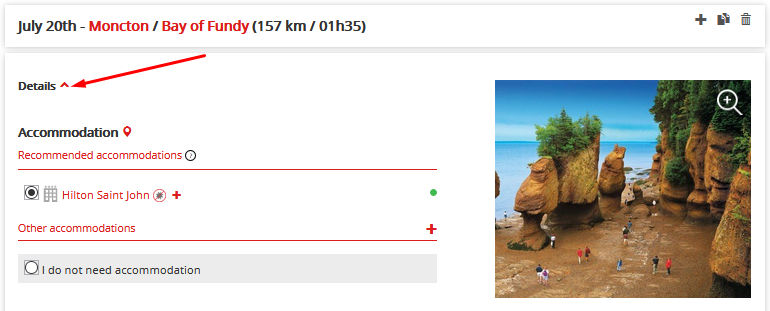
3- “Details” section
Below the day title is the “Details” section. This is the section most commonly used in customizing road trips.
The “Details” section is divided into up to 4 sections (where applicable):
- Details
- Accommodations
- Activities
- Authentik getaways
3.1- Details
The first thing to notice is that you can click on the word “Details” to see a description of the day.
Note that there will be no description when you add a destination, duplicate a day, or reverse the itinerary.
3.2- Accommodations
You will find the “Accommodation” section right under the “Details” section.
First, by clicking on the "pin" icon to the right of “Accommodations”, you can see a map showing the location of all accommodations offered for the destination. This is a convenient feature for users who like to search for accommodations by location.
Most of the time, the accommodations section is separated into 3 parts:
- Recommended accommodations
- Other accommodations
- I do not need accommodation
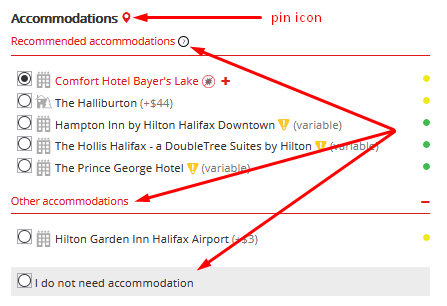
3.2.1- Recommended accommodations
The recommended accommodations have all been tested and approved by our local experts. It's like our own seal of satisfaction!
The least expensive recommended accommodation is selected by default. You can change the selection by clicking on the button next to another accommodation
.
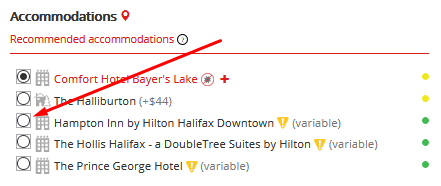
An icon just before the name of the accommodation identifies what type of accommodation it is (chalet, apartment, B&B, glamping, etc.). You will see the name of the accommodation category when you place your mouse over the icon.
Another handy tip: you can see a photo of the accommodation by placing the mouse over the name. You will also see the average rating according to travel reviews, and the basic meal plan.
When you click on the name of the accommodation, a popup window will open with various details about the accommodation to help you make an informed choice. These include, among other things:
- Travel reviews
- Photos
- Services
- Description
- Room types
- Map
Finally, after the name of the accommodation, you will see in brackets the price difference if you were to change accommodation. Note that the price of your trip indicated at the top right of the page (or in the Price tab) is updated after each change you make to your program.
3.2.1.1- Choose your room type and occupancy
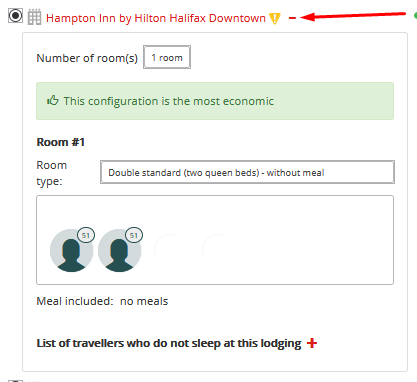
When you click on the red “+” after the name of the selected accommodation, the room selection box will open up (image above).
Most of the time, it will default to the most economical configuration.
First, indicate the number of rooms you want.
Then, for each room, select the type of room. Click on the camera icon to see more details about each room type before making your choice.
After choosing the room type, specify the room's occupancy (number of guests per room).
To assign the right guests to each room, use the rectangles with the icons. There may be a number on the icon, which indicates the person's age.
To facilitate this step, we encourage you to fill out the traveller information to keep track of which icon corresponds to which person. To do this, click on the pencil icon that appears in the top right corner of the box when you move the mouse over the guest icons. When the “Travellers Details” box opens, you can:
- Upload a photo (or avatar) for each traveller
- Enter each traveller's first and last names
- Enter the ages of the adults
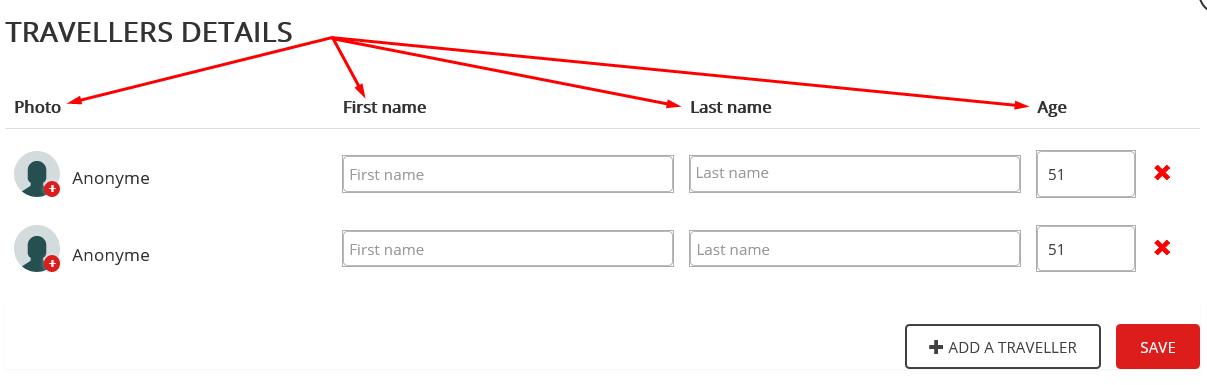
Note that there must be at least 1 adult per room.
To change the distribution of guests in the rooms, simply drag and drop their guest icons to the right rooms.
Under each room, you can also select the meal plan that will be included with your booking.
If for any reason a traveller will not be sleeping with the rest of the group, you can drag and drop his or her icon into the “List of travellers not sleeping at this accommodation” box. Click on the red “+” to open this box.
If you have any trouble making changes, don't hesitate to contact your travel agent via the Chat system or the “Contact” tab. This is probably the most difficult feature to use, so please don't hesitate to reach out. We are here to help you.
3.2.2- Other accommodations
Clicking on “Other accommodations” or the red “+” will give you access to more choices. This section is not always available.
The procedure for selecting accommodations in this section is done in exactly the same way as for the “Recommended accommodations” as explained above.
3.2.3- I do not need accommodation
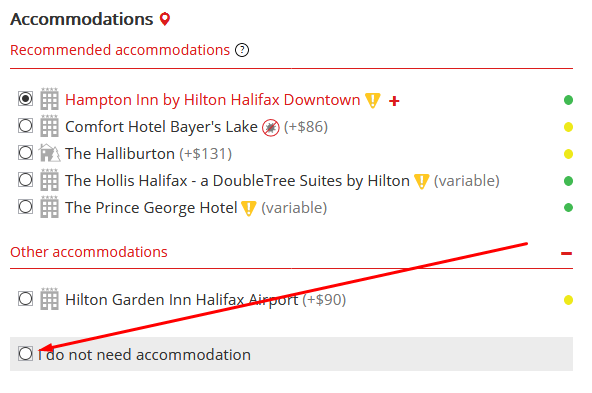
Travellers sometimes spend the night with family of friends on a given day, or they may wish to book their accommodations outside the Authentik website. In this case, simply click on the option “I do not need accommodation”.
To make the most of all the features of our road trip planner, we strongly recommend providing the address of your accommodation in the space provided for that purpose. This will allow you to use features such as the interactive map and to print your personalized roadbook to guide you when you are on the road.
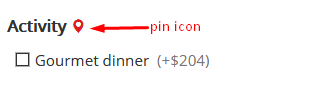
3.3- Activities
Some days offer optional activities below the “Accommodations” section.
These activities have all been tested and approved by our local experts. They have been chosen to help you discover the best that each destination has to offer, while respecting the environment and local communities.
As for the accommodations, you can see a map showing all the proposed activities for the day by clicking on the "pin" icon next to “Activities”.
When you select an activity, the price of your trip is automatically updated. Before making a selection, the price of each activity for all members of your group is shown in brackets.
As for the accommodations, you can place your mouse over the name of the activity to see a photo and the average rating when available. Clicking on the name of the activity will open a popup window presenting all the details of the activity (photos, descriptions, prices, location and reviews).
Finally, after the activity name you will sometimes see a heart icon, indicating that the activity is one of our personal favourites!
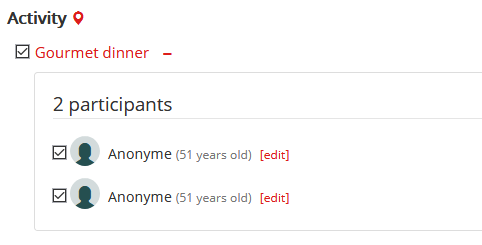
3.3.1- Deleting participants
When you select an activity, a red “+” icon appears to the right of the activity name. You can click on this icon to see the participants and, if necessary, unselect any travellers who will not be participating in the activity. Of course, the price will be adjusted accordingly.
3.3.2- Activity not available
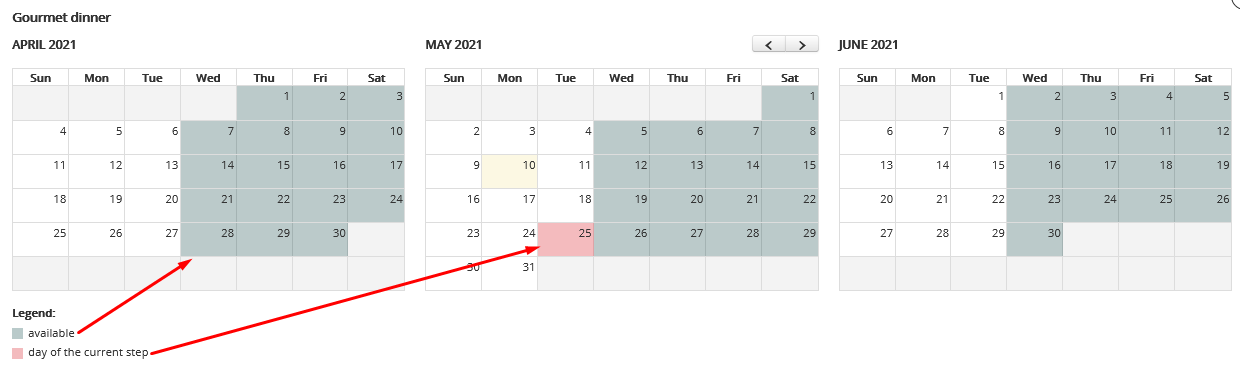
Sometimes it is not possible to select certain activities because they are not available on the date of your visit.
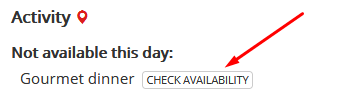
Consult the activity schedule by clicking on “Check availability” to find out more. The date shown in red corresponds to the actual date of your visit. Dates shown in blue correspond to available dates for the activity. If you absolutely want to include the activity, you will need to change your travel dates. Don't hesitate to ask one of our agents for help via the chat system, by email or by phone under the “Contact” tab.
3.4- Authentik's Getaways
Some days offer “Authentik's Getaways” under the “Activities” section.

These optional side trips have been tested by our local experts.
All Getaways include at least 1 night. This is, among other things, what distinguishes them from activities, which never include an overnight stay.
As for the accommodations and activities, you can click on the name of the Getaway to open a popup window with all the details.
To the right of the name, you will find information about the number of nights included with the Getaway.
To select a Getaway, simply click on the “+” to the left of the name and then confirm your choice by clicking on the red “Yes” button in the confirmation box.
Getaways are always added AFTER the day in which you selected it.
Important: when you add a Getaway, your trip is extended by the number of nights included in the Getaway. Your departure date stays the same. For example, if your road trip is from July 10 to 20 and you add a 2-night Getaway, your new travel dates will be July 10 to 22.
Getaways are shown in purple on your itinerary timeline.
4- “Map” tab
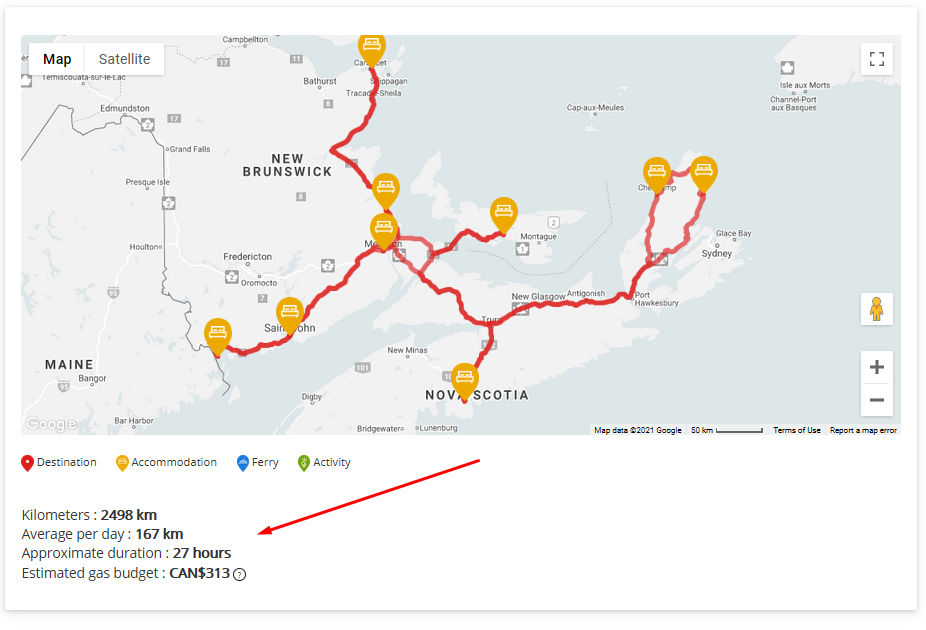
The “Map” tab is extremely useful for visualizing your route at a glance.

Note that this interactive map is automatically updated each time you make a change to your road trip. Whether you change an accommodation, add an activity or add a new destination, the map always shows the most recent version of your trip in real time.
On the map, the yellow "pins" represent your accommodations and the green "pins", your activities.
It is a Google Map, so you can use all the basic features such as Map or Satellite view and Zoom in / Zoom out.
Finally, the map includes a section with practical information such as total driving distance, total driving time and average distance per day. You will also find an approximate gas budget. This gas budget will be adjusted according to the type of vehicle you add in the road trip planner.
5- “Car” (or “RV”) tab
One of these two tabs will be shown at the top of the page, depending on the type of road trip you have selected.

The “Car” or “RV” tab is used to add a vehicle rental to your quote. The search tool will compare the prices of all available vehicles corresponding to your request.
Step I
When you first open this tab, the search fields will default to your arrival city and travel dates. You can, of course, adjust these search parameters. For example, if you arrive in Montreal and plan to spend 2 nights there, you may prefer to wait and pick up your vehicle on the day you leave for your next destination to save on rental costs.
You can also narrow your search using the filters shown under the search fields.
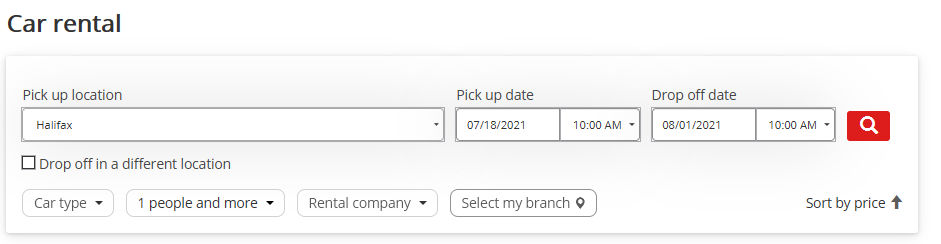
When you are ready to launch the search, simply click on the red magnifying glass.
Step II
The search tool will find all available vehicles and display them, by default, in order of price, from the cheapest to the most expensive.
You can further refine your search using the filters at the top of the page.
Note that a variety of information is displayed to help you choose. Among others, you can consult the car's technical sheet by clicking on the photo.
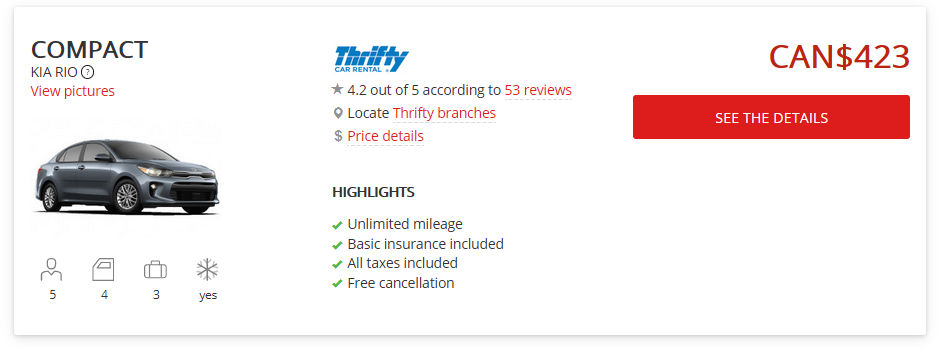
Once you have chosen your car, simply click on the “See the details” button. You can always return to the list of available vehicles by clicking on the grey "Choose another vehicle" button at the top left of Step III.
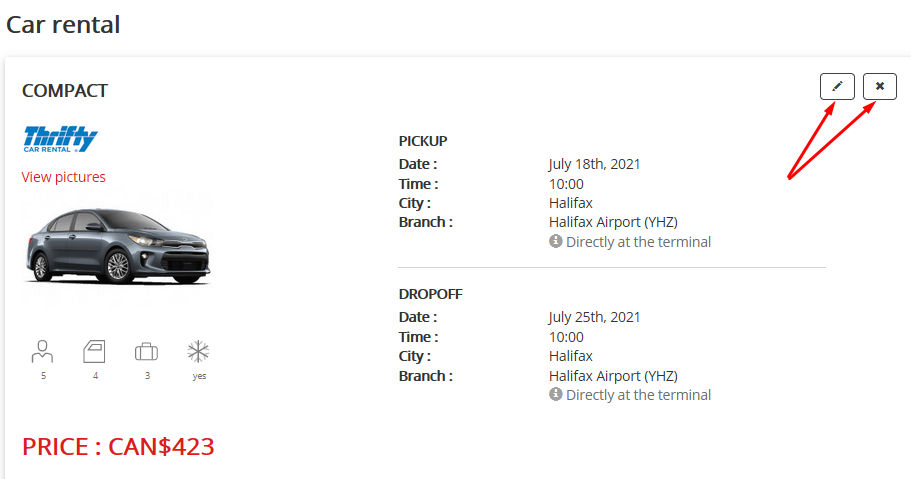
Step III
At Step III, you can see the vehicle details by clicking on “View pictures” under the vehicle type.
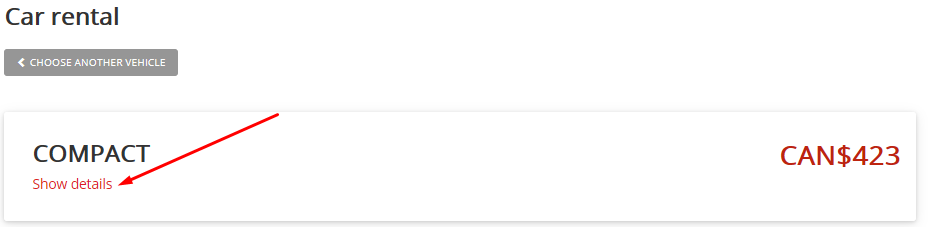
Next, for a car rental, you need to choose a branch. For RVs and motorhomes, there is no choice to be made as, unlike car rental companies, RV rental companies have only 1 branch in each city. Before selecting your branch from the drop-down menu, you can click on the pin icon to see a map of the different locations.
You will then be asked to choose your options (if applicable). Each time you select an option, the total rental price is automatically adjusted.
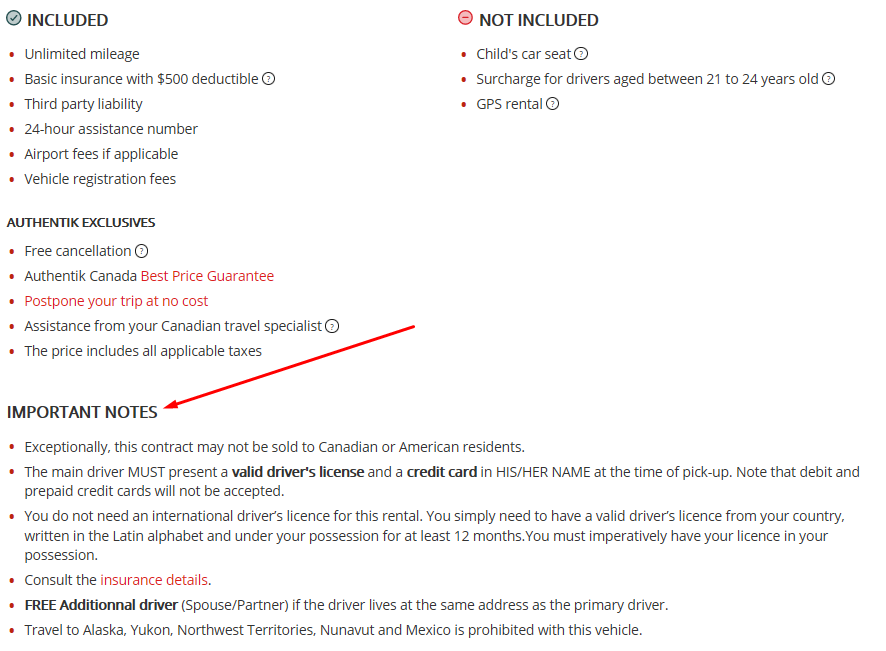
Finally, the bottom section provides all the details of your rental, what is included and not included, and a section of “Important notes” you should read to avoid any surprises.
When you are ready, simply click on the red “Add this vehicle to my quote” button at the bottom of the page.
Vehicle already added to your quote
It is always possible to delete and/or change a vehicle rental after adding it to your quote.
To delete a vehicle, simply click on the “X” in the top right corner and confirm your choice.
To change the details of your rental, click on the pencil icon in the top right corner.
The “Edit” option can only be used to change the rental details for the same vehicle (rental branch, options, dates,...). To change the type of vehicle, we suggest deleting the vehicle (by clicking on the “X”) and starting a new vehicle search.
If you want to add more than one vehicle to your quote, click on the white “Add another vehicle” button at the bottom of the page.
6- “Flight” tab

The "Flights" tab provides a useful link to book your flight using Google Flight. There are a multitude of flight search engines out there, but we find Google Flight to be one of the best and it offers very competitive prices.
Your flights will therefore be booked outside the Authentik platform and the road trip planner.
7- “Price” tab
As the name suggests, this is where you will find all the details about the price of your trip.

First, you can see the details of the price by category (accommodations, activities, vehicle, flights, etc.) by clicking on "See details" under the price.
The “Included” section lists everything that is included in the price of your quote. You can click on the red links for more details.
Just below, you will find the "Not included" section.
The other sections of the “Price” tab generally include special offers/promos and options such as insurance and home delivery of your Roadbook.
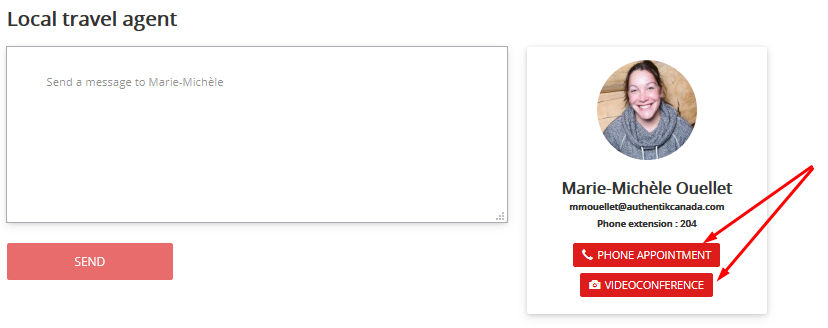
8- “Contact Us” tab
The “Contact Us” tab is used to contact your local travel agent.

You can send a written message using the text box or make a phone appointment via the red "Phone appointment" button under the photo.
Note that you can also arrange a Skype video call with your travel agent. Simply click on the "Videoconference" button under the photo.
---
Other tutorials on planning your road trip
- How do I choose my road trip?
- How do I calculate my price?
- How do I book my trip?
- How do I use my Client Space after booking?